Introduction
Two tier white cake might sound like something reserved for weddings or high-end bakeries—but around here at FoodForNearMe, it’s become a beloved family favorite. The first time I made one, it wasn’t for a grand event. It was a quiet Sunday afternoon, just me and my daughter, experimenting in the kitchen with egg whites and a dream of something elegant but simple. What came out of the oven was a cake so light, moist, and fluffy that we decided then and there it would become our “every special occasion” cake.
I’m Rachel Thompson, the mom and nutritionist behind FoodForNearMe, where I share recipes made for real life—no fancy equipment or hard-to-find ingredients, just good food that brings people together. And this two tier white cake? It’s the perfect example of that mission: impressive enough to wow your guests, simple enough that anyone can make it from scratch with a little guidance.
In this post, you’ll learn exactly how to make your own two tier white cake at home. I’ll walk you through each step—from mixing the batter and baking perfectly even layers, to making smooth buttercream and stacking your tiers like a pro. I’ll even answer those questions you’re probably Googling right now:
“How many will a 2 tier cake feed?”
“Does it need support?”
“How much should I charge if someone wants one for a party?”
And because I know life gets busy, everything here is laid out clearly with tips I’ve learned through years of baking for my own family (and the occasional neighborhood birthday bash). This isn’t just a recipe—it’s a confidence boost in cake form.
Don’t miss our helpful cake-making starter guide if you’re looking to build your skills before diving into tiers.
So whether you’re baking for a birthday, a bridal shower, or just because your family loves a slice of something sweet, this cake is for you. Let’s get started.
Table of Contents
Table of Contents
PART 1: What Is a Two Tier White Cake?
What Makes a Cake “White”?
If you’ve ever wondered how a white cake differs from vanilla or yellow cake, it’s all about the eggs. A true white cake uses only egg whites. No yolks. That’s what keeps the color so pure and clean. Sometimes the egg whites are whipped into peaks and folded into the batter, other times they’re simply added in like a traditional cake. Either way, the result is light, fluffy, and subtly flavored with vanilla and almond.
Unlike vanilla cake, which includes both yolks and whites, white cake is pale and airy. It’s also different from yellow cake, which uses just the yolks and has a deep color and rich flavor. When you’re going for an elegant look or a neutral canvas to decorate—white cake is the winner every time.
This makes it perfect for two tier designs, where appearance is just as important as taste.
Why Choose a Two Tier Cake?
Two tier cakes are incredibly popular for a reason. They offer the perfect balance between quantity and style. Whether you’re hosting a small wedding, a fancy birthday party, or a baby shower, a two tier cake delivers both visual appeal and practical serving size.
Here’s why bakers and hosts love it:
- Versatility: Can be dressed up or down for any theme.
- Portion Control: Easily serves 25 to 50 guests depending on tier sizes.
- Stability: Easier to transport and stack than taller, single-tier cakes.
Most two tier white cakes are made using a 6” top tier and an 8” bottom tier, which combine for roughly 40–50 servings. That’s ideal for medium-sized gatherings. Plus, it’s easier to decorate a smaller top tier with intricate designs or florals without overwhelming the entire cake.
When done right, a two tier white cake becomes more than dessert—it becomes a memory. In the next part, we’ll break down how to calculate servings and decide on the right size for your guest list.
Print
Two Tier White Cake – The Best Classic Recipe for Any Celebration
- Total Time: 1 hour 20 minutes
- Yield: 35–45 servings 1x
Description
This two tier white cake is soft, fluffy, and stacked to impress! Perfect for weddings, birthdays, and special occasions, this recipe walks you through each step—from baking and buttercream to stacking and decorating.
Ingredients
White Cake Batter
8 oz unsalted butter, room temperature
6 large egg whites, room temperature
14 oz granulated sugar
14 oz all-purpose flour
2½ tsp baking powder
½ tsp salt
10 oz whole milk, room temperature
2 oz vegetable oil
1 tsp vanilla extract
1 tsp almond extract
Buttercream Frosting
8 oz pasteurized egg whites (or carton egg whites)
32 oz powdered sugar, sifted
32 oz unsalted butter, room temperature
½ tsp salt
1 tbsp vanilla extract
Optional: 1–2 tbsp heavy cream for smoother texture
Instructions
Preheat oven to 335°F. Prepare two 6″ and two 8″ round pans with parchment and baking spray.
Cream butter and sugar until pale and fluffy (about 5 minutes).
Add egg whites slowly while mixing on low. Scrape the bowl as needed.
Whisk dry ingredients in one bowl. Mix milk, oil, and extracts in another.
Alternate additions of dry and wet ingredients to the batter, starting and ending with dry. Mix just until combined.
Divide batter evenly between pans and bake: 6-inch layers (25–30 mins), 8-inch layers (30–35 mins).
Cool cakes for 10–15 minutes, then turn out and wrap while warm to trap moisture. Chill before stacking.
Make buttercream: Whip egg whites and powdered sugar on high for 5 minutes. Switch to paddle, add butter slowly, mix until smooth. Add salt, vanilla, and cream if needed.
Frost each tier, add dowels to the bottom layer, and stack tiers using cake boards.
Decorate your two tier white cake with flowers, gold accents, or piping.
Notes
Cake layers can be made and frozen up to 1 week in advance.
Always chill tiers before stacking for a clean finish.
Dowels are essential for supporting the top tier.
Use clear vanilla if you want a pure white crumb.
- Prep Time: 45 minutes
- Cook Time: 35 minutes
- Category: Dessert
- Method: Baking
- Cuisine: American
Nutrition
- Serving Size: 1 slice (based on 40 servings)
- Calories: 510 kcal
- Sugar: 42 g
- Sodium: 180 mg
- Fat: 28 g
- Saturated Fat: 17 g
- Unsaturated Fat: 9 g
- Trans Fat: 0.5 g
- Carbohydrates: 58 g
- Fiber: 0.5 g
- Protein: 3 g
- Cholesterol: 3 g
Keywords: two tier white cake, white cake recipe, buttercream cake, layered cake, tiered cake
PART 2: Two Tier Cake Serving Sizes Explained
How Many People Does a Two Tier Cake Feed?
One of the most common questions home bakers ask is, “How many people will this feed?” The answer depends on the size of each tier and how the cake is sliced. A standard two tier white cake—typically an 8-inch bottom tier paired with a 6-inch top tier—feeds about 40 to 50 people.
This makes it a great option for medium-size gatherings like milestone birthdays, anniversary parties, or even smaller weddings. Here’s a quick guide to help you plan:
| Tier Size (inches) | Serving Estimate (Party Slices) |
|---|---|
| 6” + 8” | 40–50 servings |
| 8” + 10” | 60–75 servings |
| 10” + 12” | 90–110 servings |
Party-style slices are usually 1.5″ x 2″, which is a comfortable portion for dessert at most events. If you’re serving a crowd with bigger appetites or skipping other desserts, consider adding a third tier or increasing each layer’s diameter.
How Many Tiers Do You Need for 30 Guests?
If you’re planning for around 30 guests, you might wonder if two tiers are even necessary. A well-made 8-inch round cake alone can yield up to 24 servings, depending on slice size. But if you want height, presentation, or extra flavor options (like alternating layers of raspberry and lemon), going with a small two tier white cake—like a 4-inch and 6-inch combination—is perfect.
Besides looking beautiful, having two tiers makes slicing and serving easier when you’re aiming for more precise portions.
Pro Tip: Always consider your cake design, filling, and decorations when calculating serving size. Heavily frosted cakes or those with thick fillings can be sliced a little thinner without sacrificing satisfaction.
How Many Layers Per Tier?
A tier isn’t just one cake layer. Most bakers create two or three cake layers per tier, separated by generous swipes of buttercream or filling. This not only adds height and elegance but also improves texture and taste in every bite.
Here’s a typical structure:
- 6” Tier = 2–3 layers, each about 1” tall
- 8” Tier = 2–3 layers, same structure
This creates tiers that are typically 4–6 inches tall, allowing for cleaner slicing and more “wow” factor on the dessert table.
Don’t miss our complete white cake recipe to bake these layers from scratch with confidence.
What If You Want Smaller Servings?
Hosting a more intimate gathering? You can scale down your two tier white cake by reducing layer height or using 4” and 6” pans. You’ll still get the classic stacked appearance, but fewer leftovers and a quicker bake time. Ideal for elopements, dinner parties, or intimate anniversaries.
PART 3: Gather the Good Stuff – Ingredients for the Best Two Tier White Cake
Start with What Matters Most
To build a showstopping two tier white cake, you don’t need fancy ingredients—you just need the right ones. The perfect white cake is clean in color, soft in texture, and strong enough to stand tall. That’s especially true when you’re stacking layers for a two-tier design.
In my kitchen at FoodForNearMe, I’ve tested more cakes than I can count. Some were too soft and collapsed under frosting. Others looked beautiful but turned dry by the next day. After all that experimenting, I’ve narrowed down the ideal formula: everyday ingredients, balanced just right to deliver a moist, fluffy, and stack-worthy cake.
Here’s what I reach for when baking this beauty:
- All-Purpose Flour
This everyday staple gives the cake structure. Unlike cake flour, which can make tall layers too delicate to stack, all-purpose flour offers a little extra strength—just what a two-tier cake needs. - Unsalted Butter (Room Temp)
Butter brings that unmistakable richness we all crave in a homemade cake. Room temperature is key—it should be soft enough to cream, but not melting. - Granulated White Sugar
Classic sugar sweetens the batter and helps create a light, airy crumb when properly creamed with the butter. - Egg Whites Only
No yolks here. Egg whites are what give this cake its signature pale color and tender bite. They also help whip air into the batter for extra lift. - Whole Milk (Slightly Warmed)
Adds moisture and richness. I warm mine for a few seconds in the microwave so it blends smoothly and doesn’t shock the batter. - Neutral Oil
A splash of oil locks in softness and keeps the cake from drying out overnight—ideal for party prep or wedding orders. - Baking Powder
Gives your cake height and helps it bake up evenly, especially important for stacking multiple layers. - Salt
Just a pinch balances all the sweetness and enhances flavor. - Clear Vanilla Extract
All the classic flavor, none of the tint. If you want your cake as bright white as possible, this is your go-to. - Almond Extract (Optional)
A tiny dash adds that unmistakable “bakery cake” aroma. It’s subtle but makes a big impact.
Why This Combo Works for Tiered Cakes
This ingredient list may seem simple—but it’s intentionally crafted. The combination of butter for flavor and oil for moisture makes a cake that’s not only delicious but also holds up beautifully under buttercream and fondant.
- All-purpose flour gives just enough structure so the top tier won’t sink into the bottom.
- Egg whites make the crumb tender without heaviness.
- Neutral oil helps the cake retain moisture even after chilling or freezing (a must when assembling in stages).
- Clear extracts protect that brilliant white color that gives this cake its elegance.
The result? A cake that slices clean, stands tall, and tastes as good on day two as it did fresh from the oven.
How Much to Make for Two Tiers?
Let’s break down the batter needs so you get just the right amount—no more, no less. This keeps your bake time accurate and your layers even.
For a traditional two tier setup using 6-inch and 8-inch round pans (each with 2 layers), you’ll want:
| Tier Size | Layers | Approx. Batter Needed |
|---|---|---|
| 6-inch | 2 | 4 cups |
| 8-inch | 2 | 6 cups |
That’s a total of 10 cups of batter for a standard two tier cake. If you’d like a taller look with three layers per tier, increase the total to around 15 cups and bake the layers a bit thinner.
Want to make ahead? You can bake and wrap the layers tightly, then freeze them until you’re ready to build. Just thaw in the fridge overnight and bring them to room temp before trimming and frosting.
Looking for a reference recipe? Check out this white cake recipe breakdown for flavor inspiration and scaling tips.
PART 4: How to Make the Cake Layers – Crafting a Two Tier White Cake from Scratch
Bake With Confidence, Layer by Layer
The real beauty of a two tier white cake lies in its layers—soft, sturdy, and stacked with intention. While frosting and decorations often steal the spotlight, it’s what’s inside that makes the cake truly memorable.
Whether you’re baking for a birthday bash or your very first wedding order, this part of the process lays the foundation. It’s not complicated, but it does call for some precision and patience. Let’s walk through every step so you can feel confident from the moment you preheat your oven to the final layer cooling on your counter.
Step 1: Set Up for Success – Pan Prep and Oven Temp
Start by prepping two 6-inch pans and two 8-inch pans, each 2 inches deep.
- Grease the sides and bottoms well using your favorite method—cake goop, butter and flour, or baking spray.
- Line the bottoms with parchment paper for clean, easy removal.
- Set your oven to 335°F. This slightly lower temp ensures that the cakes bake evenly without doming or browning too quickly.
Place your oven rack in the center, and let the oven come to temperature before the batter goes in.
Step 2: Creaming the Base – Butter and Sugar
In a large bowl or stand mixer, beat your softened unsalted butter and granulated sugar together on medium-high. You’re looking for a light, fluffy texture—that usually takes 4 to 5 minutes.
This isn’t just about combining ingredients. Creaming introduces air, which gives your cake lift and softness later on.
If your kitchen is on the cooler side, it might take an extra minute or two. Room temperature butter should still hold its shape but give easily under gentle pressure.
Step 3: Blend in Egg Whites – Smooth and Slow
With the mixer running on low, add the egg whites gradually. Go one at a time and let each blend fully before adding the next.
This slow addition helps the mixture stay smooth and prevents curdling. It also helps maintain the structure you’ve already built during the creaming stage.
If your egg whites are cold, place them in a bowl and set it in warm water for a few minutes before using. Room temperature is ideal for best results.
Step 4: Mix Wet and Dry in Rounds
Whisk together your dry ingredients in one bowl (flour, baking powder, salt) and your liquids in another (milk, oil, extracts).
Now add them to the batter in alternating batches:
- One-third of the dry mix
- Half of the liquid mix
- Repeat and end with the final third of the dry mix
This method keeps the batter from becoming too loose or dense. It ensures even mixing and a beautifully smooth texture.
Mix just until combined. Overmixing can toughen your cake, which we definitely don’t want.
Step 5: Fill Your Pans and Bake
Divide the batter evenly between your pans. Use a kitchen scale if you want perfectly level layers—it really helps when you’re building a two-tier cake that needs to stack evenly.
Give the pans a gentle tap on the counter to pop any big air bubbles.
Bake until a toothpick inserted into the center comes out clean or with a few moist crumbs.
Baking time guide:
- 6-inch pans: 25–30 minutes
- 8-inch pans: 30–35 minutes
Avoid opening the oven too early. Let the cakes rise and set before you check—patience pays off here.
Step 6: Cool and Seal In the Moisture
Let the cakes cool in their pans for about 10 minutes. Then, turn them out onto wire racks.
Here’s a trick I use for every celebration cake:
Wrap each cake in plastic wrap while it’s still slightly warm. This seals in moisture and makes the layers easier to handle when you’re ready to frost and stack.
You can chill the layers in the fridge for a few hours or freeze them for later. Either way, wrapping while warm makes a big difference in texture.
Step 7: Trim, Chill, and Stack with Ease
Once your cakes are completely cool, level the tops using a serrated knife or cake leveler. If the layers are firm from chilling, this step is quick and clean.
At this point, you can:
- Wrap and freeze them for later use
- Begin stacking and filling
- Or store them overnight in the fridge if you’re decorating the next day
Want more pro-level layering tips? Peek at this helpful white cake recipe guide to see how bakery-level consistency is achieved every time.
When you master the bake, you’ve already done the hardest part. These layers will stack beautifully, hold frosting like a dream, and slice cleanly at any celebration.
PART 5: The Buttercream That Holds It All Together – How to Frost a Two Tier White Cake
Buttercream Isn’t Just the Icing on the Cake — It’s the Structure
When it comes to a two tier white cake, frosting does more than make things pretty. It seals in moisture, adds flavor, and, most importantly, holds those layers in place. That’s why I rely on this tried-and-true buttercream that’s light in texture, not overly sweet, and firm enough to keep everything steady from fridge to dessert table.
You don’t need a culinary degree to master this recipe. With just a few pantry ingredients and a stand mixer, you’ll create a buttercream that’s smooth, versatile, and easy to work with—even if this is your first time frosting a stacked cake.
Ingredients for Success
This is my go-to buttercream for layer cakes, birthdays, and especially tiered designs. It’s stable, whips up fast, and tastes like something you’d find in a boutique bakery.
Here’s what you’ll need:
- 8 oz pasteurized egg whites (room temp)
- 32 oz powdered sugar (sifted)
- 32 oz unsalted butter (softened but not melty)
- 1 tablespoon vanilla extract
- ½ teaspoon salt
Optional but helpful:
- 1–2 tablespoons heavy cream for extra creaminess
- Clear vanilla if you want to keep the frosting bright white for wedding-style finishes
This recipe yields enough frosting to fill, crumb coat, and fully frost a two tier cake (6” + 8”), with a bit left over for touch-ups or simple piping.
Making It: Step-by-Step Buttercream That Never Fails
Step 1: Whip the Whites and Sugar
Pour your egg whites and sifted powdered sugar into the bowl of a stand mixer. Use the whisk attachment and begin on low speed. Gradually increase to high and whip for 5 minutes. You want a light, meringue-like base that’s glossy and holds soft peaks.
This step gives the frosting its airiness and smooth texture. It also sets the stage for that magical transformation once the butter is added.
Step 2: Beat in the Butter
Switch to the paddle attachment and turn the mixer down to low. Start adding your softened butter, one cube at a time. Let each piece fully blend before adding more.
At some point, the mixture may look a little off—loose, even curdled. That’s normal. Just keep mixing. After a few minutes, it will come together into a silky, spreadable frosting.
Step 3: Add Flavor and Finish
Once the frosting smooths out, stir in the vanilla extract and salt. Want a softer consistency for final coating or piping? Add a spoonful of heavy cream and beat until it’s fluffy but firm.
And that’s it! You’ve got a frosting that spreads beautifully and supports a stacked cake without sliding or melting.
Why It’s Perfect for Two Tier Cakes
- Sturdy, but light – It doesn’t crust too fast, which gives you more time to work with it.
- Smooth and spreadable – Makes for clean lines or rustic swoops.
- Mild flavor – Enhances the cake without overpowering delicate white layers.
- Color-friendly – Can be tinted or left neutral to fit any design style.
It also stores beautifully, so if you want to make it a day or two ahead, just chill it and re-whip when ready to use.
How Much Buttercream Do You Need?
For a standard two tier white cake with 6″ and 8″ layers:
| Tier Size | Layers | Frosting Estimate |
|---|---|---|
| 6-inch | 2 | 2 cups |
| 8-inch | 2 | 3 cups |
| Total | — | 5 cups |
Planning on piping borders, roses, or swirls? Go ahead and make 6 to 7 cups to be safe.
Rachel’s Real-Life Buttercream Tips
- Use fresh egg whites from a carton for convenience and safety. No separation or measuring needed.
- Bring your butter to true room temperature—cool, soft, and pliable, not melty or greasy.
- Frost in stages: Apply a thin crumb coat, chill the cake for 20 minutes, then add the final coat.
- Keep extra on hand—you never know when you’ll need a touch-up or a piping fix.
This frosting is as reliable as it is beautiful. Whether you’re frosting your very first two tier cake or your fiftieth, it’ll help you achieve that smooth, bakery-style look right from your own kitchen.
Need a visual walk-through or want to see how I frost my celebration cakes? Try this buttercream masterclass recipe for step-by-step visuals and pro-level guidance.
PART 6: Assembly and Layering – How to Build the Perfect Two Tier White Cake
Turn Simple Layers into a Showstopper
Once your cake layers are baked and your buttercream is whipped, it’s time to turn those beautiful components into a fully stacked, frosted two tier white cake. This is the part where your kitchen creation truly transforms into a centerpiece—something worthy of a birthday, wedding, or any celebration.
Assembling a two tier white cake doesn’t require professional tools or experience, just the right method, a steady hand, and a few simple supports. Once you learn the steps, you’ll be able to recreate this process any time you want to impress your guests with a homemade, bakery-style dessert.
Step 1: Level and Prepare Your Cake Layers
The foundation of a sturdy two tier white cake is flat, even layers. Use a serrated knife or cake leveler to trim any domed tops and make sure each cake tier sits perfectly flat. This will make your stack more stable and help you frost smoothly.
Pro Tip: Chill your cakes first—cooler cakes are firmer, easier to trim, and less likely to crumble.
Step 2: Frost Each Tier Separately
Frosting your tiers individually gives you full control over the finish and makes the final assembly much easier.
For each cake tier:
- Place the bottom layer on a cake board (8-inch for the bottom tier, 6-inch for the top).
- Spread a generous layer of buttercream between layers.
- Apply a crumb coat—a thin layer of frosting that locks in crumbs.
- Chill the tier for 15–20 minutes.
- Apply a smooth final coat and return to the fridge to firm up.
When each tier is frosted and chilled separately, stacking your two tier white cake becomes a breeze.
Step 3: Add Dowels for Structural Support
One of the biggest mistakes home bakers make with a two tier white cake is skipping support. No matter how light your layers feel, once stacked, the weight adds up. Without dowels, your top tier can sink into the bottom, damaging the entire cake.
Insert three or four food-safe dowels or thick straws into the center of your bottom tier:
- Mark where the top of the cake meets the dowel.
- Cut each dowel to size so they sit flush with the top of the frosting.
- Arrange them in a small circle where the top tier will sit.
These dowels act like stilts, keeping your two tier white cake upright and stable.
Step 4: Stack Your Cake
Once both tiers are chilled and doweled, it’s time to carefully place the top tier onto the bottom.
Here’s how to do it:
- Use a spatula or your hands to lift the 6-inch top tier.
- Center it directly over the dowels on the 8-inch tier.
- Gently lower it into place.
To reinforce the entire two tier white cake, insert a single long dowel down through both tiers and into the cake board below. This central support is optional, but especially helpful if your cake will be moved or transported.
Step 5: Smooth, Clean, and Add Finishing Touches
Once your two tier white cake is stacked:
- Fill in any small gaps at the seam with buttercream.
- Smooth the sides again with a bench scraper.
- Chill the whole cake for 30 minutes to set everything before decorating.
Now, the canvas is yours. Whether you’re going for floral, minimalist, or festive, the base of your two tier white cake is strong, clean, and celebration-ready.
Why Proper Assembly Matters for a Two Tier White Cake
Stacking a two tier white cake correctly is more than just making it look good—it’s about stability. A cake that holds its shape through cutting, display, and transport is the mark of a well-assembled bake.
Here’s a summary of the structural tools you’ll need:
| Tier | Cake Board | Dowels | Central Support |
|---|---|---|---|
| 8-inch base | Yes | 3–4 | Optional but recommended |
| 6-inch top | Yes | No | Sits on bottom supports |
Following these steps ensures your two tier white cake not only looks professional but also survives the party intact.
Need a visual tutorial on stacking a two tier white cake? Don’t miss this step-by-step guide with pro visuals to walk you through it.
With the layers built and stacked, you’ve now created more than just a dessert—you’ve crafted a memory. A two tier white cake is a show of effort, love, and a little kitchen magic. And best of all? You did it yourself.
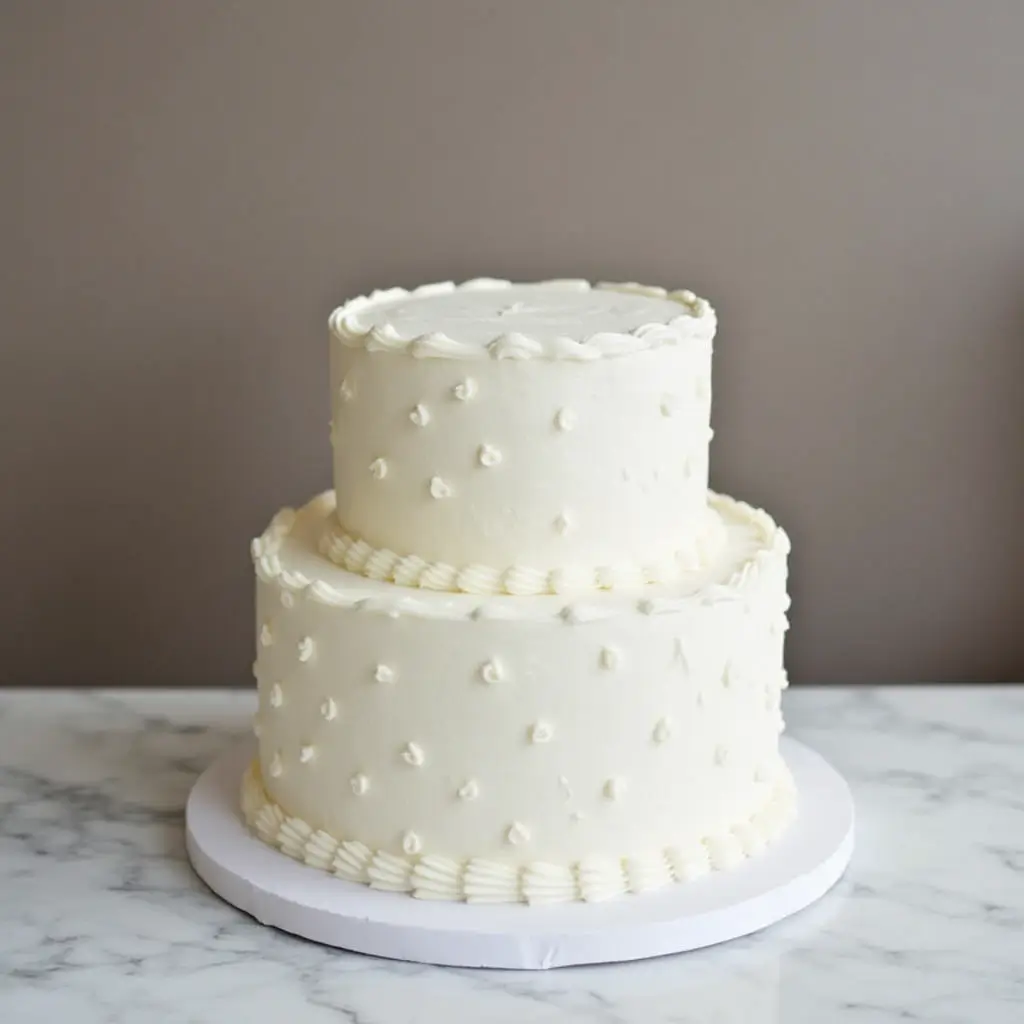
PART 7: Decoration Ideas – How to Style Your Two Tier White Cake Like a Pro
Your Two Tier White Cake Deserves a Beautiful Finish
You’ve mixed, baked, stacked, and frosted with care—now it’s time to transform your two tier white cake into a centerpiece that truly celebrates the moment. Whether you’re preparing it for a wedding, baby shower, birthday, or family gathering, the decoration is where your creativity gets to shine.
A two tier white cake is the perfect blank canvas. Its neutral look works with every style—from fresh florals and gold drips to minimalist textures and bold party themes. And the best part? You don’t need to be a professional decorator to make your cake stand out. With the right ideas and a few simple tools, your homemade cake can look just as stunning as anything in a bakery window.
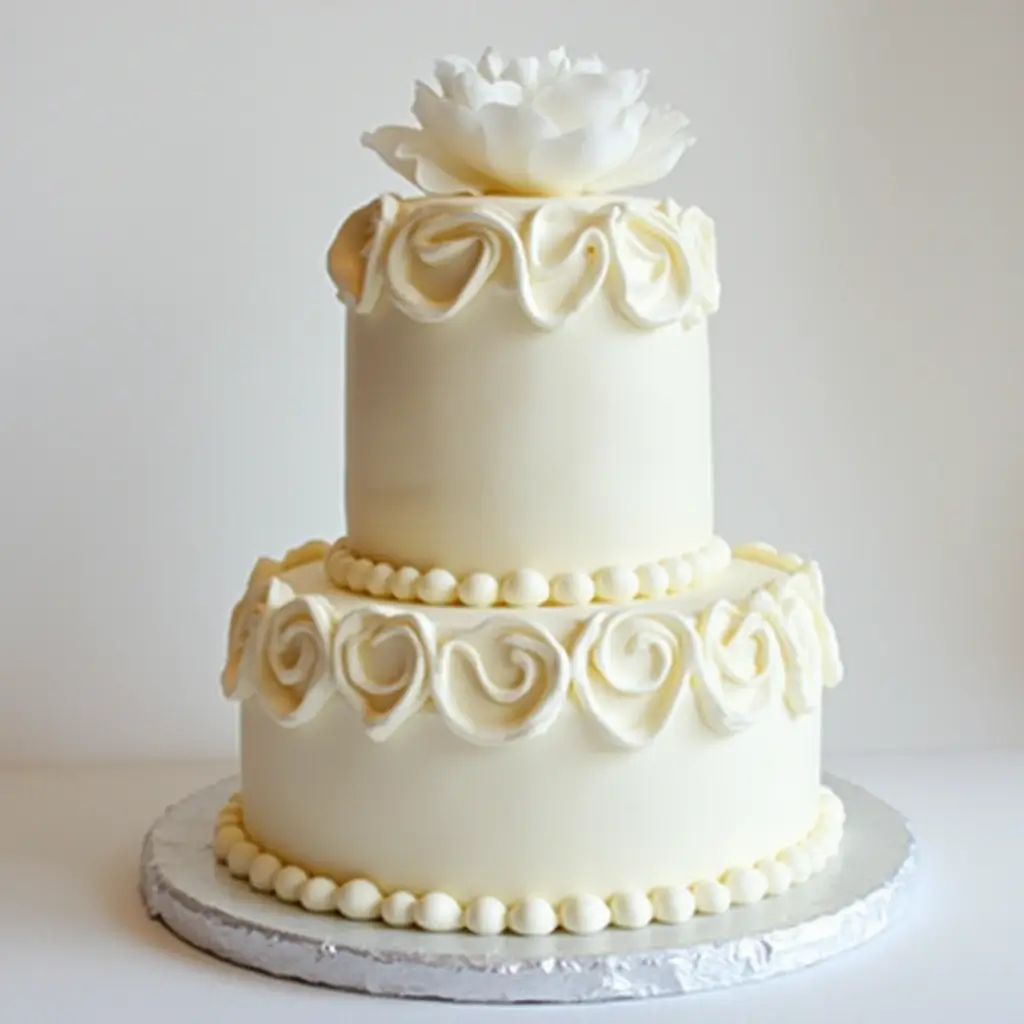
1. Timeless Elegance: White on White
A classic design never goes out of style. A clean, white-on-white design gives your two tier white cake a refined, wedding-worthy finish.
Ideas to try:
- Smooth buttercream with clean edges
- Pearl borders piped at the base of each tier
- Tiny white blossoms or sugar flowers placed delicately on top
Perfect for: Weddings, anniversaries, christenings, or formal dinners
2. Rustic Charm: Semi-Naked or Naked White Cake
If you love farmhouse vibes and effortless beauty, a rustic two tier white cake might be your ideal choice. A semi-naked cake shows off the cake layers through a thin coating of buttercream and adds a natural, homemade appeal.
Styling tips:
- Lightly frost the cake, then gently scrape to expose the layers underneath
- Decorate with fresh figs, berries, or florals
- Place the cake on a wooden stand for added rustic feel
Perfect for: Country weddings, bridal brunches, or seasonal events
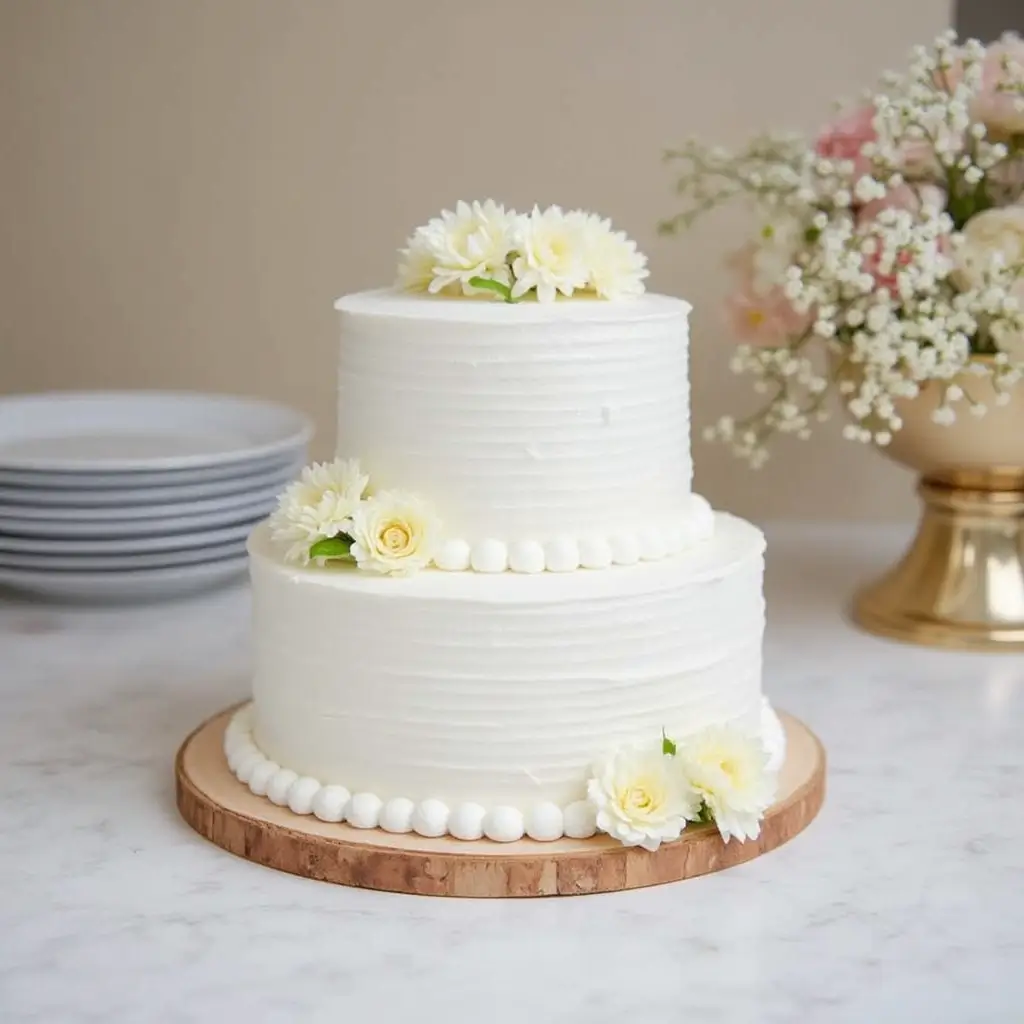
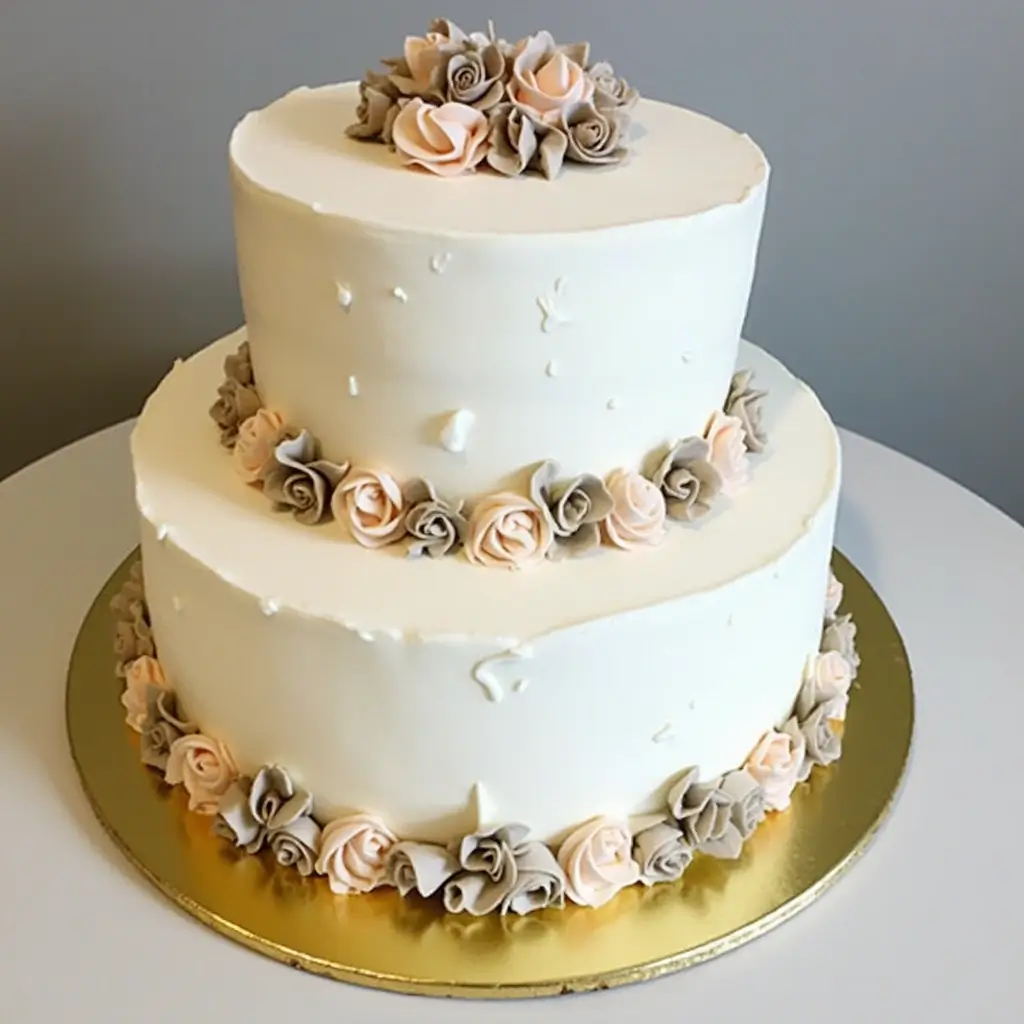
3. Blooming Beauty: Floral Two Tier White Cake
Nothing brings life to a two tier white cake like flowers. Whether you choose edible blooms or fresh florals, this style adds romance and natural color that pairs beautifully with white buttercream.
Floral decor ideas:
- Add a fresh flower topper or side cascade
- Use greenery like eucalyptus or herbs like rosemary
- Mix in edible blooms like violas or pansies for safety
Note: Always use pesticide-free flowers and food-safe stems for safety.
Perfect for: Garden parties, spring weddings, or boho birthdays
4. Golden Glamour: Metallic Accents
Give your two tier white cake a luxury glow with metallic finishes like gold, silver, or rose gold. A touch of shimmer adds elegance without going over the top.
Metallic styling ideas:
- Drip the top tier with white chocolate ganache, then brush the drip with edible gold dust
- Add gold leaf to one side of the cake for a bold look
- Wrap edible gold ribbon around the base of each tier
Perfect for: Milestone birthdays, New Year’s celebrations, or upscale events
5. Personalized and Themed Cakes
A two tier white cake also works beautifully for themed events. From children’s birthdays to baby showers and everything in between, your cake can be dressed to match the moment.
Fun theme ideas:
- Rainbow sprinkles and colorful piping for kids
- Baby blue or soft pink tones with fondant booties for showers
- Graduation colors and edible toppers for school celebrations
Pro Tip: Keep the base white and add themed colors and accents—it makes your cake look clean and balanced while still being festive.
6. Clean and Modern: Minimalist Chic
For a sleek and simple look, go minimalist. A modern two tier white cake needs only a few thoughtful touches to make a bold statement.
Ideas to explore:
- Sharp buttercream edges with zero piping
- A single sugar flower, oversized bow, or fondant geometric shapes
- One-tone color palette (like all white, ivory, or blush)
Perfect for: Modern weddings, stylish birthday dinners, or brand-themed events
Tools That Make Decorating Easier
Even simple tools can elevate the look of your two tier white cake:
| Tool | Use |
|---|---|
| Bench scraper | For smoothing frosting sides |
| Offset spatula | For spreading frosting and leveling |
| Piping bags and tips | To create borders, florals, and designs |
| Cake turntable | Helps with smooth rotation while decorating |
| Edible paint or shimmer | For metallic touches and elegant details |
Make It Your Own
What makes a two tier white cake so special is how versatile it is. Whether you’re aiming for understated charm or something truly eye-catching, the neutral base lets your design ideas take center stage.
Decorating should be joyful, not stressful. Start simple, build confidence, and remember that every cake you make is part of your story. Even imperfections can add character, especially when you’re creating for people you love.
Looking for visual inspiration? Check out this white cake styling guide filled with photo ideas and tutorials for every cake style.
Your beautifully decorated two tier white cake is now ready to take the spotlight. Whether you’ve chosen florals, gold, sprinkles, or texture, your cake will not only taste amazing—it’ll be remembered long after the last bite.
PART 8: Pricing & Planning – What to Know Before Making a Two Tier White Cake
What’s a Two Tier White Cake Worth?
A two tier white cake isn’t just cake—it’s time, tools, and detail. Most homemade cakes cost $80–$135 in materials and labor. Custom orders can sell for $100–$200+, depending on décor and servings.
Serving Sizes
A typical 6” + 8” two tier white cake serves:
| Style | Servings |
|---|---|
| Party Cut | 34–40 |
| Wedding Cut | 42–47 |
Choose slice size based on your event style.
Walmart vs Homemade
- Walmart cakes: $65–$75, basic flavors, bulk-made
- Homemade cakes: Custom design, fresher, better quality
Homemade two tier white cakes offer personal value that store cakes don’t match.
Smart Pricing Tips
- Base price: $85–$100
- Add-ons: +$10–$30 for florals, toppers, etc.
- Be confident—your skill adds real value
Budget-Friendly Cake Planning
- Stick to buttercream
- Use garden flowers or fruit
- Freeze layers ahead
- Simplify décor
Even a simple two tier white cake can look elegant and impressive with smart choices.
Quick Recap
| Feature | Budget | Custom |
|---|---|---|
| Cost | $50–$70 | $100+ |
| Servings | 35–45 | Up to 50 |
| Décor Options | Basic | Premium |
PART 9: Frequently Asked Questions About Two Tier White Cakes
How many will a two tier cake feed?
A standard two tier white cake with 6-inch and 8-inch tiers feeds 35 to 45 people, depending on how it’s sliced. Wedding servings (1″x2″) yield more than party-sized slices.
How many layers of cake are in a two tier cake?
Most two tier white cakes have 2 to 3 layers per tier, separated by buttercream. That means you’ll typically bake 4 to 6 total layers for one stacked cake.
How much should I charge for a two tier birthday cake?
For a custom two tier white cake, pricing typically starts at $100 to $150, depending on flavor, decoration, and size. Premium designs with florals or gold accents may go higher.
How many people does a Walmart two tier cake feed?
Walmart’s pre-made two tier white cake serves 40–50 people and usually costs less than custom options. However, customization and freshness are limited.
How many tiers do I need for 30 people?
You can serve 30 guests with a small two tier white cake using a 4-inch + 6-inch or 6-inch + 8-inch tier combo. Always confirm your guest count and slice size.
Does a two tier cake need support?
Yes. Every two tier white cake should include internal supports (like dowels or bubble tea straws) to prevent the top tier from sinking. Add a central dowel for extra stability.